


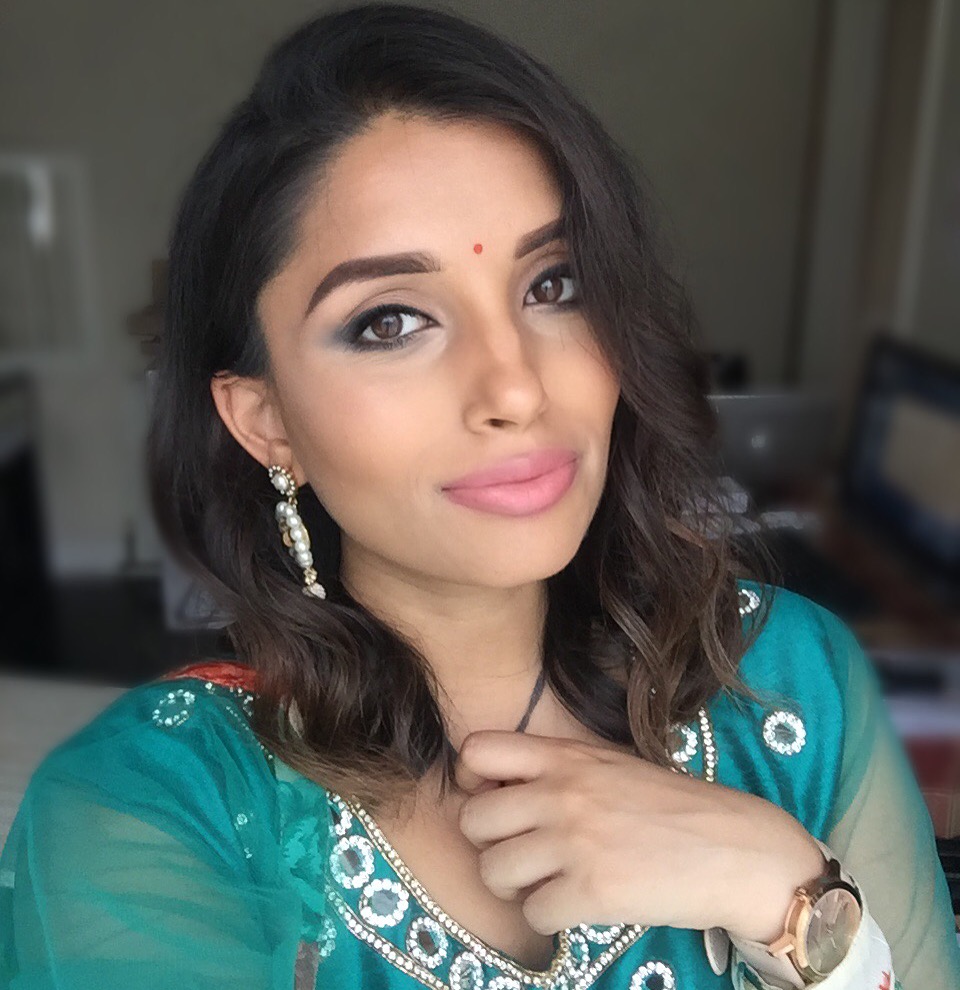
With summer…comes weddings. And with weddings…comes lots of glamorous make-up looks 🙂
I posted a wedding look I did recently on my Facebook Page and Instagram and thought it would be good to share with you the products I used and how I created the eye look-just in time for those all summer long weddings!
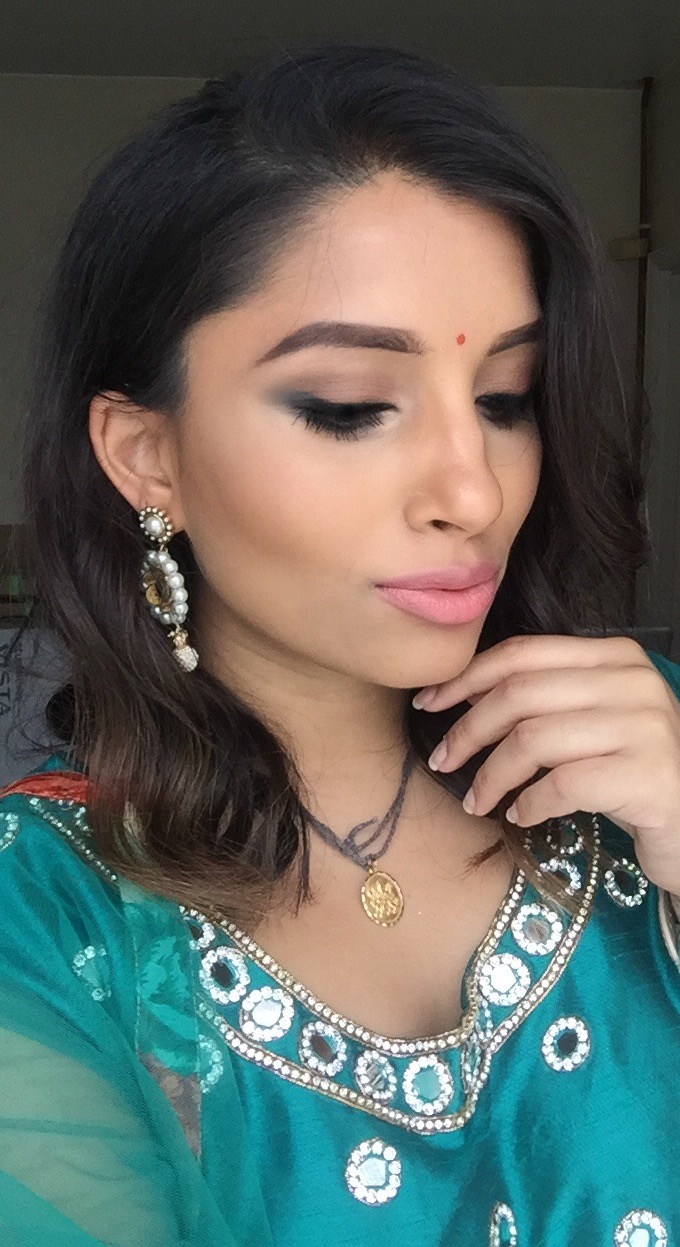
The eye look is super easy and doesn’t require many products. Here is a step by step on how I created the look. NOTE-you’d probably want to do one eye at a time on this look as you have to be fairly quick working with the gel liner before it dries.
- First prep and prime your eyes. I normally use a cream concealer set with a loose translucent powder. This will give you an even base to work on.
- Using the shade Bengal from the Anastasia Beverly Hills Tamanna Palette, apply all over the eyelid using a soft fluffy brush. This shade is everything-a beautiful terracotta shade which suits all skin tones. Its great as a shadow on its own or blended with a darker shade to contour the eyelid.
- Line your upper lashline with a gel liner-but don’t extend the line past the end of your lashline. I used Maybelline Eye Studio Lasting Gel Liner in Black. Its really easy to work with while its still drying.
- Using a small domed brush, like E34 Dome Utility Brush by Sigma Beauty, gently buff the gel liner in small strokes and circular movements. This will help give a smokier finish and fade any harsh lines so its super blended.
- Towards the outer corner of the eye, you want to drag the liner out just to give a feline finish. As you drag the liner out, you want to gradually apply light pressure so as to not create a block.
- To really intensify the liner, use a black shadow (I used Noir from the Anastasia Beverly Hills Tamanna Palette as its super pigmented)..and carefully press the shadow over the gel liner. The Sigma Beauty E21 Smudge Brush is perfect for this as its small and dense enough to apply a decent amount of shadow and the shape helps smudge the eyeshadow and blend.
- Again, when you get to the outer corner of your eye, you want to drag the shadow out. You can blend it slightly into the socket line if you want to do so.
- After applying lashings of mascara and falsies if you want extra drama, apply some black shadow using the Smudge Brush on your lower lash line to define the eye.
For a softer look, you can always use a brown shadow or skip out either the gel liner or black shadow. The best thing about this look is that you can adjust it to suit however intense you want it.
Ciao for now…x